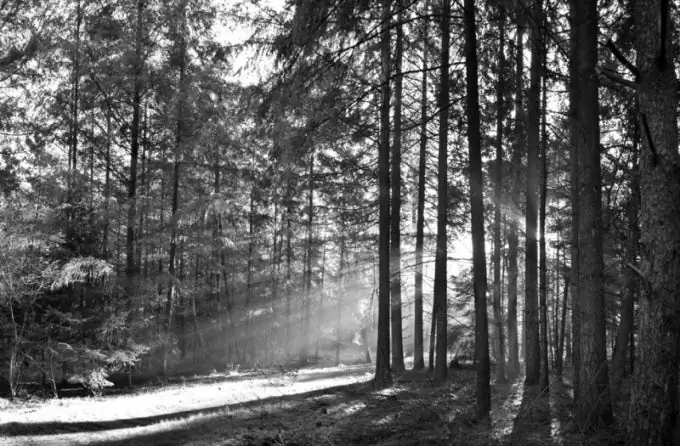
The expressiveness of nature is usually conveyed through color - bright strokes of watercolor or oil. To make a pencil drawing as emotionally intense, you need to find some kind of visual accent in the landscape. For example, an unusual play of light in a forest glade.

Instructions
Step 1
Place the sheet of paper horizontally. Use a hard pencil (2T or 4T) to sketch. The lines should be light, without pressure, so that it is easier to remove them in case of a mistake. Divide the sheet in half using a vertical line. Step back about a quarter of a half to the right and draw another vertical. At this point, there is the border between the lit and shaded parts of the forest.
Step 2
Divide the vertical line into five equal parts. At the place of the lower dividing line, the trunk of a tree will begin, which is located at the border of light and shaded part of the landscape.
Step 3
Set aside one fifth of the height of the leaf from the drawn tree to the right and draw another trunk. It should be slightly closer to the bottom border of the sheet. At the same distance, draw the lines of the trunk of the next tree (it is twice as wide as the previous ones) and also lower them down. At the very edge of the page, draw the last, widest tree.
Step 4
On the left side of the space, sketch out the silhouettes of the rest of the trees, decreasing their width as they recede into the background.
Step 5
Start hatching the drawing. For darker areas, take softer pencils, tint light ones with hard, sharpened ones. Pay attention to the color distribution on each barrel. At the edges, the tone is more saturated than in the center - observing this rule, you will give the picture volume.
Step 6
Shade the ground covered with grass with short vertical lines, also increasing pressure and using pencils of different hardness. When the shading is complete, create the effect of light breaking through the thicket. To do this, with a nag eraser, barely pressing, slide over the drawing from right to left, repeating the direction of the light. Highlight areas on the grass. After that, restore the color of the tree tables on the right.
Step 7
To make the drawing look more expressive, you can slightly exaggerate its contrast - to enhance the boundaries of light and shadows cast by trees.


