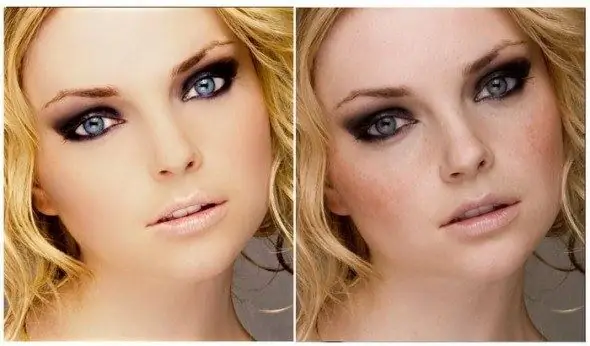
If the photo is too sharp, small imperfections and wrinkles are visible on the skin, Photoshop will help you eliminate all this. To make a photo matte, you just need to know the basics of this program - adding layers, applying filters and layer masks.

It is necessary
- - digital photography;
- - computer and Photoshop.
Instructions
Step 1
Open the image in the program, make a duplicate of the layer. On a new layer, remove all skin irregularities - unnecessary moles, acne, scratches, wrinkles. Use a healing (healing brush) for this.
Step 2
Make another duplicate of the layer and choose Noise / Dust and Scratches among the filters. Try changing the filter settings to get the perfect soft blur. Do not worry that your eyes have also become blurry - in the future they will be bright again. On the same layer, apply a Gaussian Blur to create even more haze.
Step 3
To give the skin the desired texture, to make it more realistic and not so smooth, add another filter - "Noise" / "Add noise". Select "Monochrome Noise" and choose the optimal value, usually no more than 1%.
Step 4
To add this layer to the original photo selectively (for example, only on the skin, leaving the eyes, hair, lips clear), click the "Layer mask" button at the bottom of the palette. Select in the tools "Fill", black color and click on the document. As a result, the cloudy layer created during the first steps should hide.
Step 5
Now start adding haze to the photo. To do this, select a brush from the tools, reduce the hardness as much as possible (you can also lower the transparency). Make sure to be on the layer mask and tone the model's skin, being careful not to get into the eyes, hair, eyebrows, lips. If you are wrong, switch to a black brush and erase part of the layer.
Step 6
If you additionally need to change the color, use options such as "Photo Filter", "Color background" / "Saturation", "Color balance".
Step 7
To sharpen some parts of the photo and leave the main part matte, duplicate the middle layer and change the Blending Mode to Overlay. Find Color Contrast among the filters and set the appropriate value. If the effect is too strong, lower the opacity of the layer.


