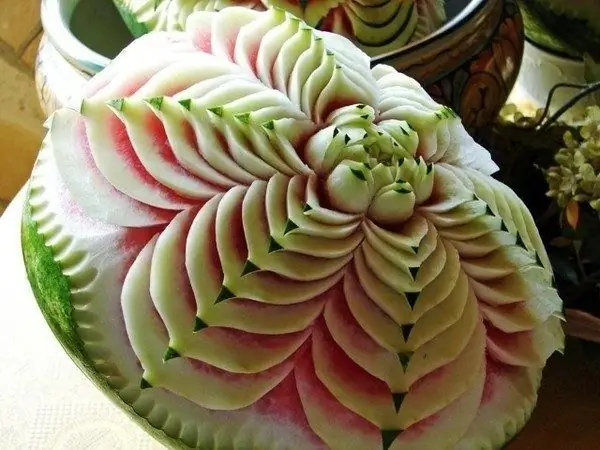
Decorative carving of figurines from vegetables and fruits is a real art that requires precision and meticulousness from the author. Until recently, curly cutting of vegetables and fruits was the prerogative of restaurants. But now everyone can learn this art.

Carving is the art of decoratively carving figurines from fruits and vegetables. Anyone can learn this cutting technique and decorate their holiday table with beautifully decorated dishes. The main thing in carving is strict adherence to instructions, especially at the initial stage of training.
You should start learning carving with the simplest manipulations. For example, you can cut original flowers from boiled carrots. To do this, peel and cut the carrots into longitudinal plates so that their thickness does not exceed 3 millimeters. You will need to cut an isosceles triangle from the plate and make incisions on one side of it. You should now have neat teeth. Try to lay the prepared blanks with the cloves outward to make a pretty flower. It remains only to drip mayonnaise into the middle of the flower and put a pea. By the way, instead of a pea, you can use beet puree.
You can practice carving a funny goby from tomatoes. To do this, you need to take a strong tomato and cut out a small oval-shaped part for the muzzle from one side. Cut the oval off the other side as well. Cut a flat slice from the remaining part. Then cut it in half and cut a half from one part of the slice. This will be the jaw of your bull. Cut a couple of slices from the rest of the tomato, remove some pulp from them and give the shape of an ear. Oval eyes should be cut out of the egg white with scissors. You can start to lay out the figurine on the dish. Put the small oval first, then the larger oval. Tuck in the ears and gently shape the muzzle. So it remains only to put eyes. By the way, for the pupils, you can use black peppercorns. And the horns are carved from olives.
To create an original fruit basket from a watermelon, you will need to perform more complex manipulations. First you need to wash and drain the prepared watermelon. Then measure its diameter and be sure to remember the size of half of its height. After that, lightly scratch the middle of the height of the watermelon around its entire circumference. Attach to it a template for the handle element of your future basket and transfer the drawing to the top of the watermelon. Move the template and gradually mark out the entire handle of the decorative basket. On either side of the handle, carefully cut off two quarters of the top of the watermelon. Do not touch the pulp under the basket handle. Using the markings, cut the pattern on the handle to the full thickness of the crust. For this, it is better to use a sharp and narrow knife. The process is nearing completion. It remains only to free the lower half of the watermelon from the pulp. Do this with a spoon in portions and leave a slight layer of pulp on the crust. Its thickness should not exceed a couple of centimeters. And don't forget to curly cut out the rim to make your fruit basket look more impressive.


