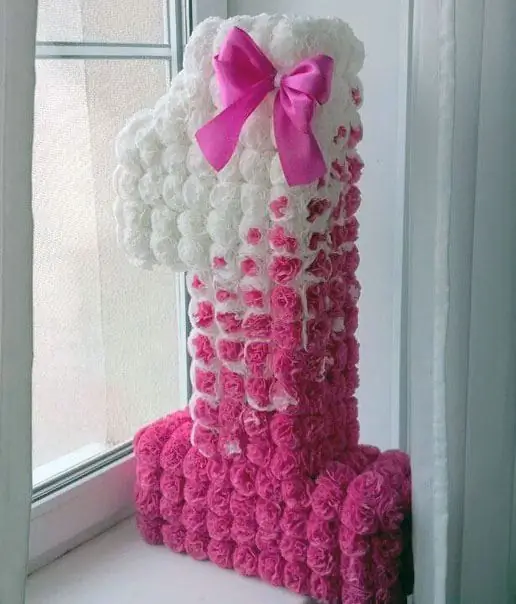
For a festive birthday party and the subsequent photo shoot, you need the appropriate props. Hand-made volumetric figures can be an ideal decor for a holiday. The numbers, decorated with flowers from napkins or corrugated paper, look light, airy and incredibly beautiful, so they will undoubtedly become the main decoration of any holiday.
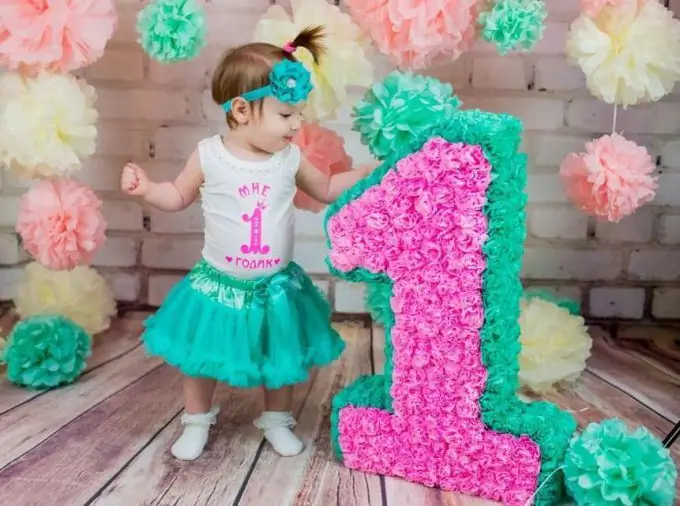
The process of creating a volumetric figure for a festive photo session can be conditionally divided into two stages: making the base and decorating the finished structure.
Step 1 - making the base
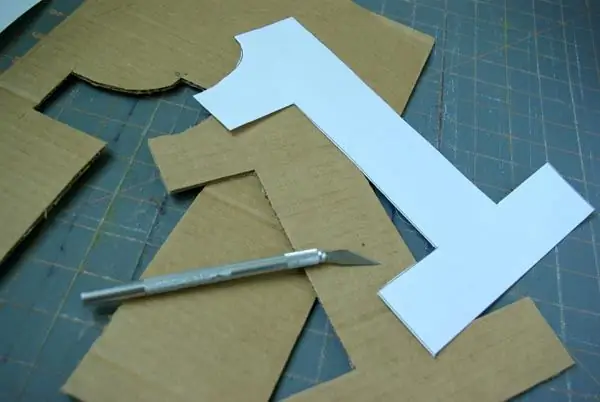
To create a voluminous birthday figure, you first need to make a cardboard base, and then decorate it with corrugated paper, paper napkins, pompoms or woolen threads. If you are planning to make a large figure, then you need to stock up in advance with boxes of large household appliances (refrigerator, gas stove, TV, etc.). The box must be divided into sheets and laid out on the floor. On a cardboard sheet, you need to draw a silhouette of the required figure and cut it along the contour. The size of the figure depends on your desire and the size of the cardboard sheet.
We apply the cut template to another sheet of cardboard and outline it along the contour, after which we also cut it out. As a result, we get two identical numbers to each other. In addition to these two blanks, we need strips of cardboard (the width of the strips will determine the thickness of the product), from which the side walls of the figure are made. After all the cardboard blanks are made, you can start assembling the volumetric figure, gluing the parts with masking tape.
Also, the basis for the volumetric figure can be made of foam. You can buy foam sheets at any hardware store. If you want to make the number thicker, then the two foam panels can be glued together using ceiling tile adhesive. True, this material is quite capricious in work: when cutting, the foam crumbles, and the granules stick to tools and hands.
Step 2 - decorating the figure
Decorating numbers with paper flowers
Beautiful and lush flowers can be made from papyrus or corrugated paper. To do this, fold a stack of 6 sheets of paper with a small accordion and cut into three equal parts. We tie each accordion with a thread in the middle, round the ends and turn the paper inside out so that the petals are obtained. When a sufficient number of colors have been made, we glue them to a number made of cardboard or foam.
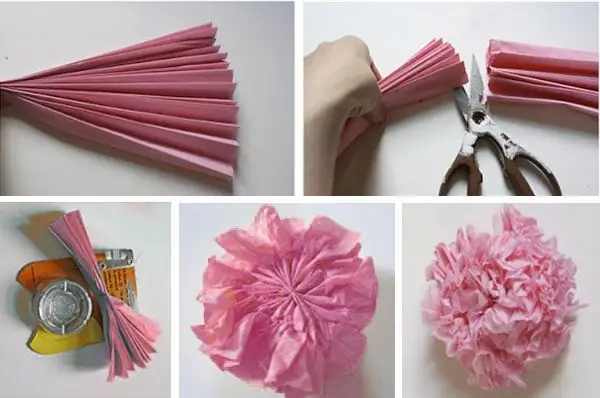
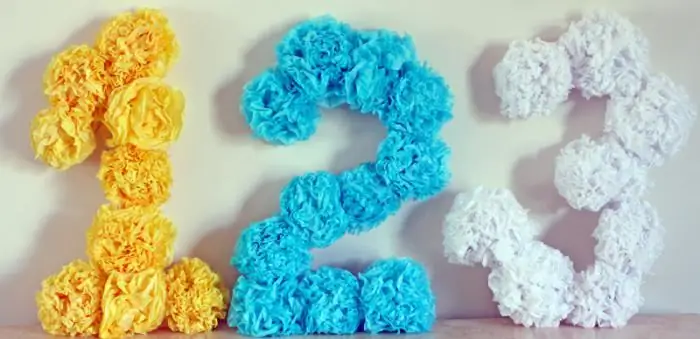
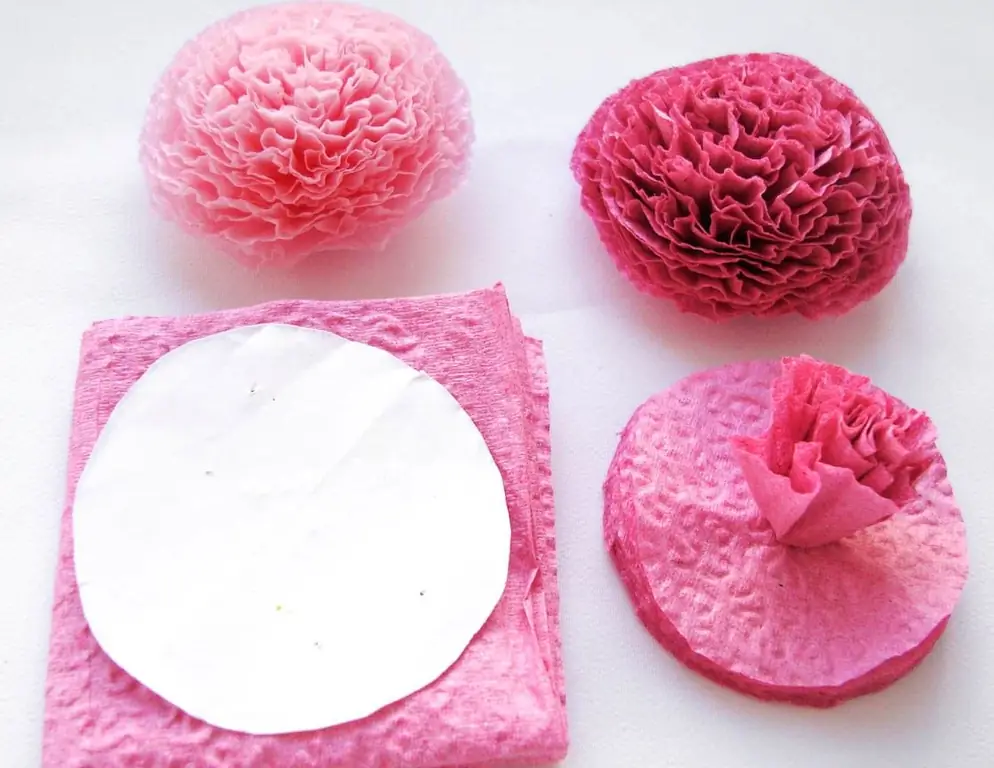
Numbers decorated with flowers from paper napkins look no less lush and festive. To create such a decor, you will need 100-150 packs of plain napkins, depending on the size of the number. We fold each napkin in half twice and fix the structure with a stapler in the middle. Cut out a circle from the resulting square. Then we lift all the layers of the circle up one by one, slightly flattening them with our fingers. The bottom layer of the mug should be left straightened, as with its help the flower will be attached to the cardboard base.
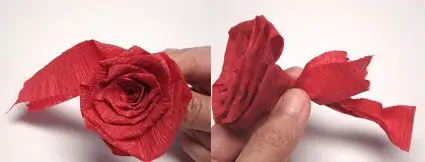
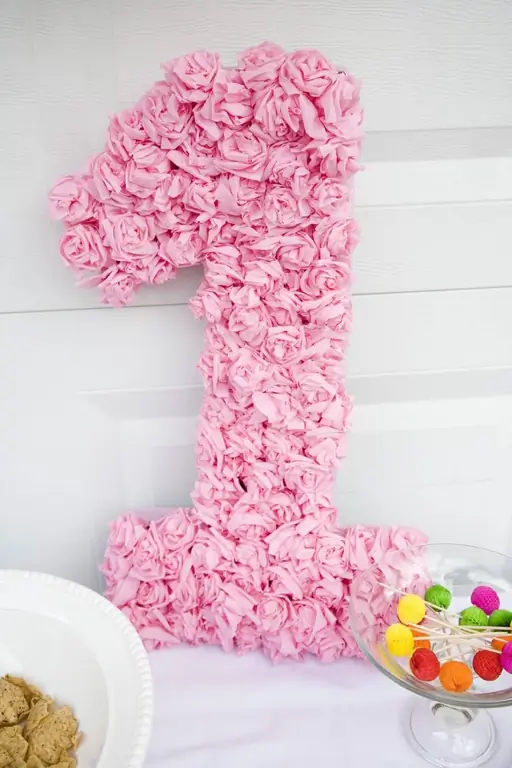
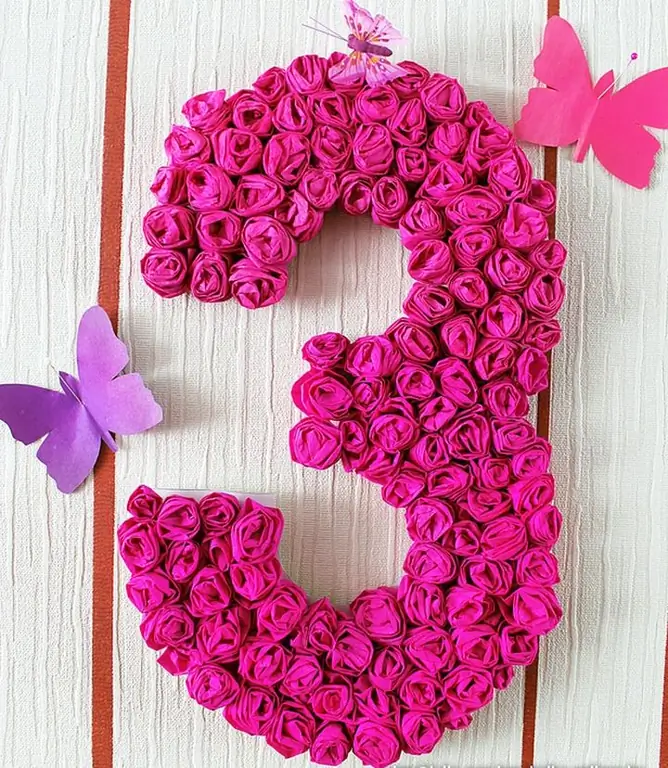
The numbers, decorated with corrugated paper roses, look delicate and airy. The creation of such a decor is a rather laborious process, but the result is worth it. To do this, cut the corrugated paper into long strips. The size of the future flower will depend on the width of the stripes. We slightly wrinkle the paper tape with our hands, after which we begin to twist, slightly bending the edges to make the petals. Twist the rest of the ribbon at the base of the resulting flower. In a similar way, we make the required number of roses, after which we glue them to cardboard with hot glue.
Decorating a digit with paper using the facing technique
The numbers, decorated using the facing technique, look lush and elegant. To make such a decor, corrugated paper must be cut into squares of the same size. Insert a pencil into the middle of the square and wrap paper around it. Then we dip the tip of the pencil in PVA glue and attach the paper to the cardboard blank. In this way, we fill in the entire surface of the volumetric figure and carefully spread the decoration with our hands. Decor made of tulle or organza will look no less impressive. In this case, the material is also cut into squares and attached to the base with hot glue.
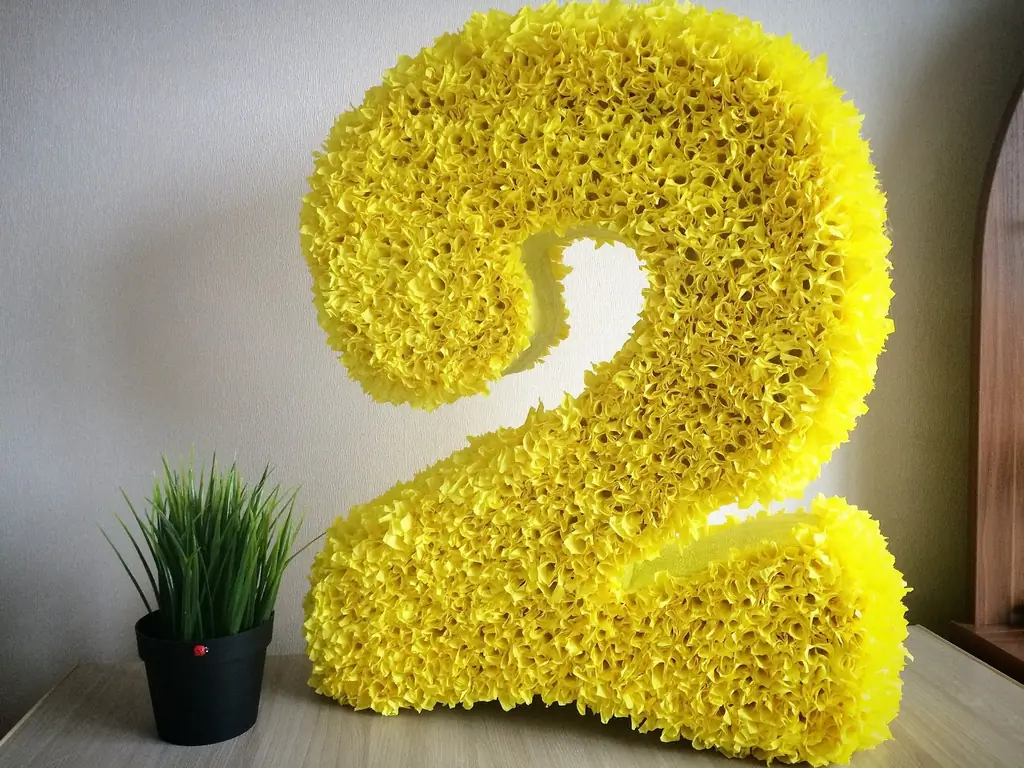
If a foam blank is used as a base, then no glue is used at all. In this case, we wind the paper on a toothpick, which easily pierces the foam and leaves a trimming in it. In the facing technique, it is very convenient to create various patterns within the figure, for this it is enough to outline the pattern on the base and use different colors of paper along its contour.
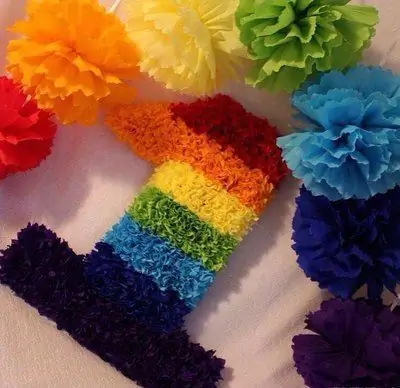
Fringed digit decoration
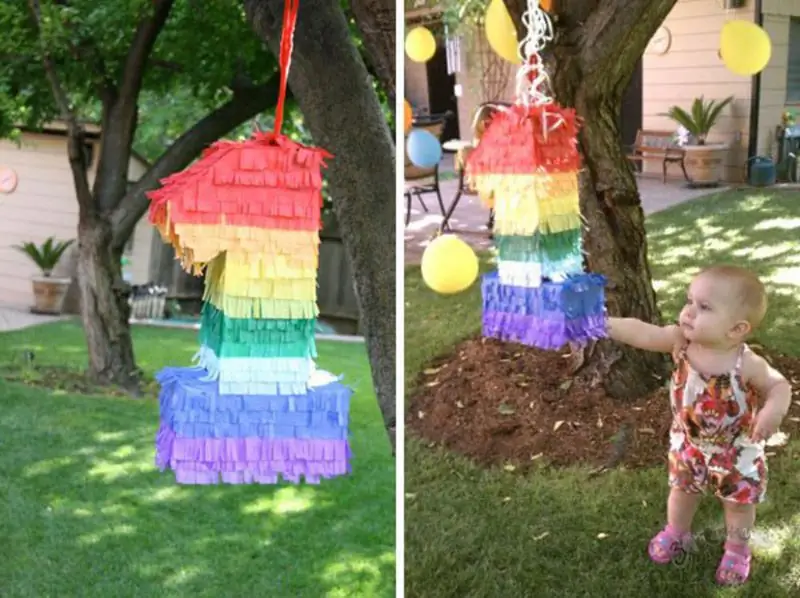
Corrugated paper fringe is perhaps the easiest and fastest way to decorate a three-dimensional figure. Cut the paper into long and wide strips. We fold each strip into a rectangle and cut it with a fringe, then straighten it and glue it to the base on double-sided tape.
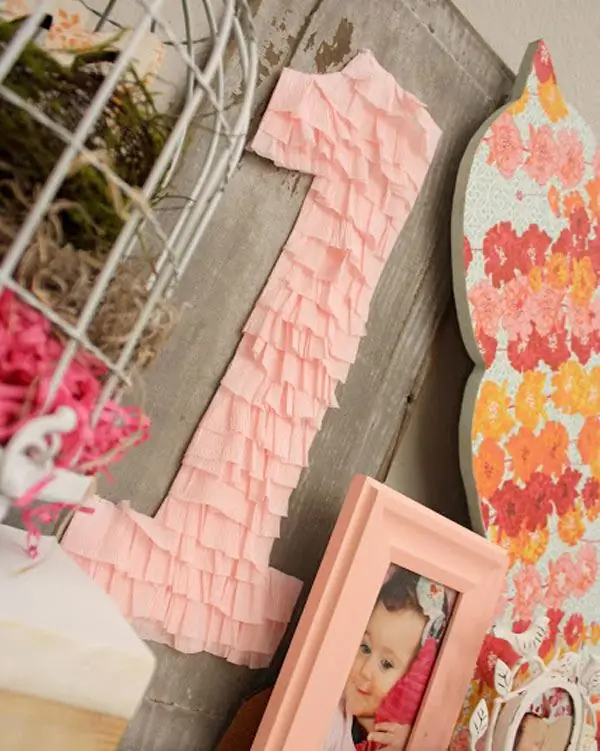
Decorating the figure with pompoms
First, you need to make a lot of pom-poms from woolen threads. To make them, you will need two rings of the same size, cut from thick cardboard. We put the rings on top of each other and wrap them with woolen threads until the hole of the ring closes. Then we cut the threads with scissors along the edge, move the rings a little and tie the threads. Remove the cardboard blanks and shake the pompom. We make the required number of pompons using the same principle. Glue the finished decor to the cardboard figure with hot glue.
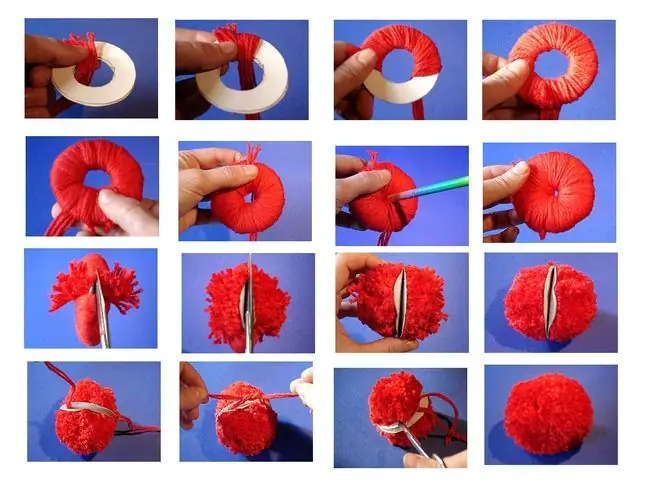
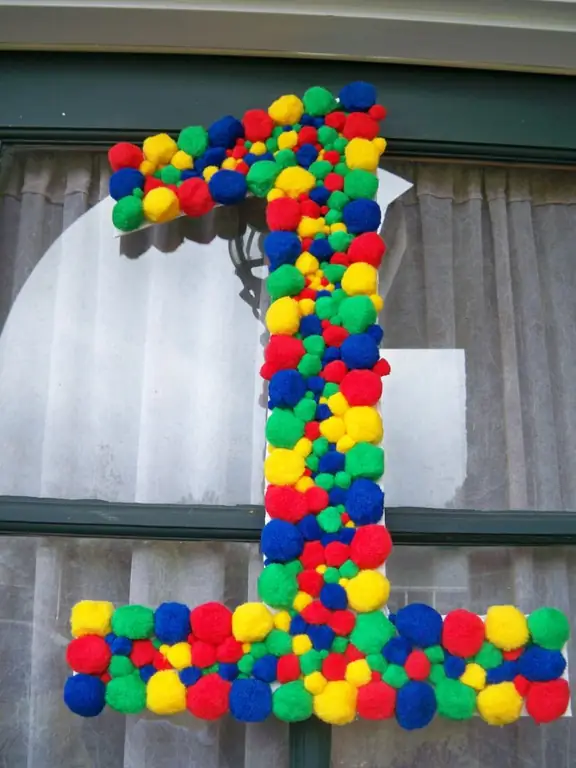
Decorating the figure with yarn
For work, you need a large skein of yarn and PVA glue. On the sides of the cardboard figure, apply a small amount of glue and begin to tightly wrap the workpiece with woolen threads. First, we wind the yarn across, and then along.
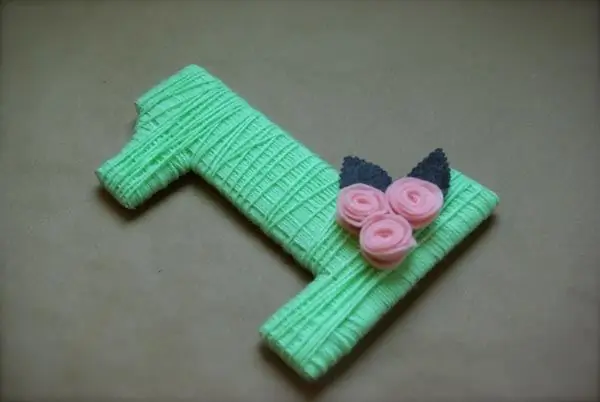
Volumetric figures are suitable for both a small and an adult birthday boy. The size of the figure depends only on your desire and design idea. Large figures are used for a photo shoot, and small numbers are used to decorate the dining area and candy bar. To decorate a children's party, it is better to make a figure the size of a child or slightly taller than him.
The decor of the volumetric figure can be monochromatic or multi-colored. To make the figure look more voluminous, the front part should be decorated in light colors, and the sides in dark ones. For the girl's birthday, the number can be decorated with paper flowers of pink, red, orange, lilac and purple. When creating a number for a boy's birthday, it is better to use blue, cyan, white and green colors, and instead of paper flowers, it is better to use decor in the form of fringes or pompons.


