Drawing an apple from life is one of the first lessons of academic drawing. This task is carried out by students in the first grade of an art school. If you want to learn how to draw, you will have to learn this lesson too. When drawing an apple, you will learn how to convey a rounded shape using lines and light and shade.

It is necessary
- - paper;
- - hard and soft pencils;
- - an apple or a picture with its image.
Instructions
Step 1
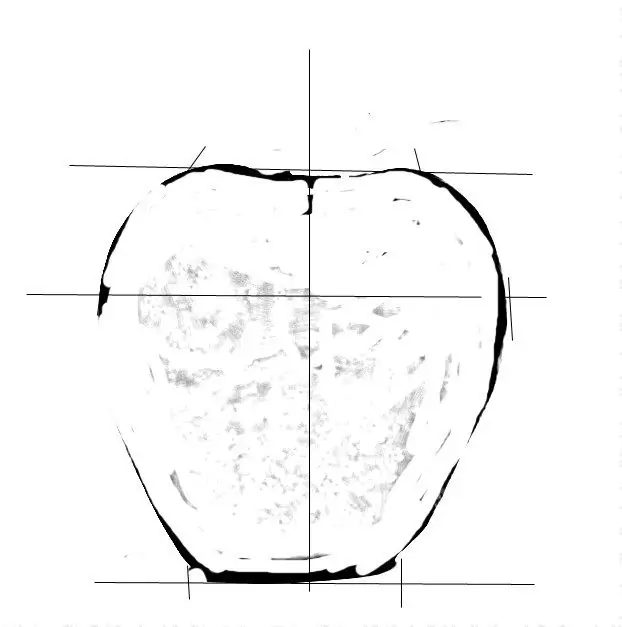
Before depicting any object, you need to take a good look at it. For the first time, of course, you can try to sketch an apple from a picture, but it's better to do it from nature. So, put the apple at some distance from you, with the leg up. Determine the ratio of height to maximum width. You can schematically represent an apple, depicted on a plane, in the form of two trapezoids with one common base. Determine the ratio of the heights of these trapezoids.
Step 2
Place the sheet as you like. Apples come in different shapes - some are elongated in length, others are flattened. They can also be of irregular shape. Draw a vertical line approximately in the middle of the sheet.

Step 3
Mark the vertical height of the apple, as well as the distance from the bottom point to the most convex part. Draw horizontal lines across the marks. You have already determined the aspect ratio when looking at it. Mark the width of the apple at its lowest point and highest point, as well as the most convex one. All preliminary constructions are best done with a sharply sharpened hard pencil.
Step 4
Connect the marks with raised lines. Trace the outline of the apple with a softer pencil.

Step 5
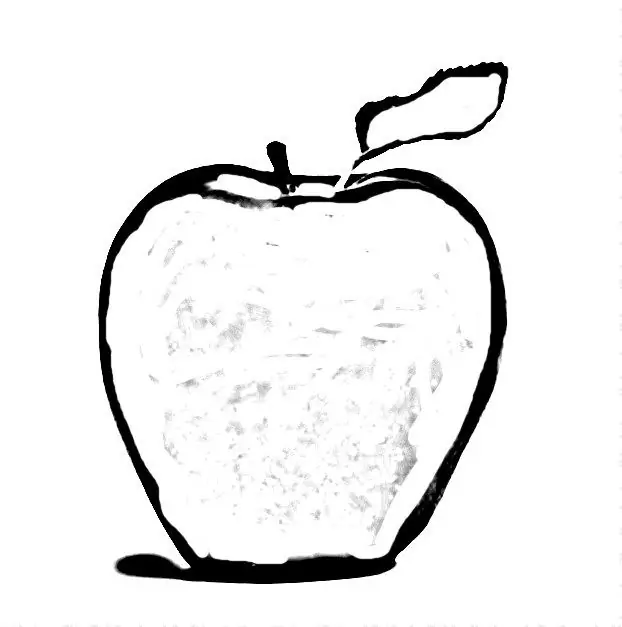
Draw a ponytail. Note that it is not straight, but slightly curved. A leaf will greatly decorate the drawing. The “tail” grows in a small groove. It can be drawn with a curved line, the corner of which is directed downward.
Step 6
Draw the ponytail and the leaf with a soft pencil. Pay attention to which side the shadow falls from the apple. Its size and direction depends on the location of the light source.
Step 7
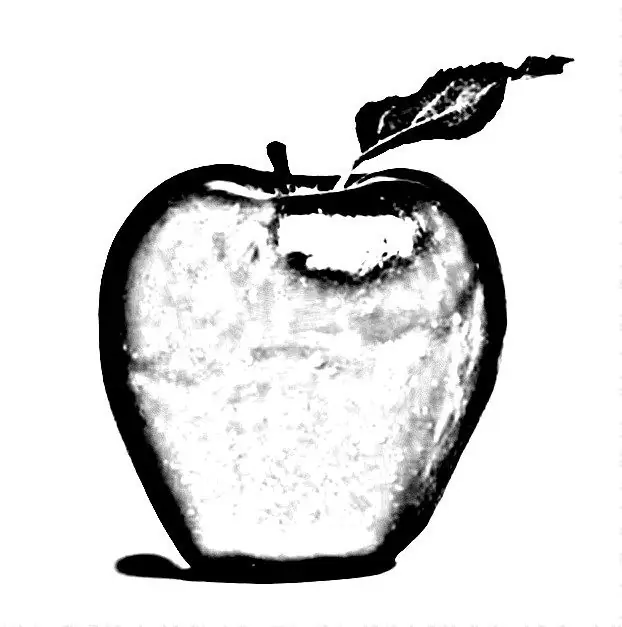
You can convey the shape of the apple using shading or shading. The latter option is good if you are drawing with a very soft pencil or charcoal. When working with a pencil of medium hardness, shading is preferable. On the side that is farther from the light source, the strokes often lie almost close to each other. They are located parallel to the contour line. From the side that is closer to the light source, the strokes are sparser and lighter. However, you can do otherwise by imposing horizontal shading. But in any case, it will be darker on the side where the shadow falls.

Step 8
If you want to convey the shape with feathering, draw a very thick line around the outlines. Then make a few strokes within the contours of the apple and leaf and blend the spots. They will be darker on the side opposite to the light source.


