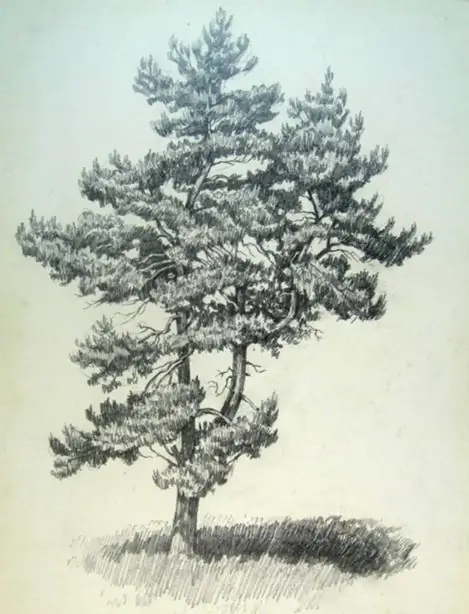
When painting a landscape, one must not only correctly create a composition, build a perspective and take into account the peculiarities of the location of shadows, but also be able to recognizably depict various tree species on paper. You can start practicing drawing trees with a pine tree, which is both a simple and interesting object for an inexperienced artist.

It is necessary
Pencil, eraser on paper
Instructions
Step 1
Start with a trunk that is straight and rather thin in pine trees growing in the forest or outdoors. Draw a very narrow and long rectangle in the middle of the album sheet, tapering towards the top. In a field pine, the trunk can bifurcate in the first quarter of the ground.
Step 2
Draw the texture of the bark, which has a rather rough relief. This can be done by making short, chaotic strokes with a pencil.
Step 3
Start drawing the branches growing from the pine tree almost perpendicular to the trunk. However, you should not depict the branches with straight lines - this looks unnatural. Draw broken, bizarrely curved lines, and remember to split the large branch into several smaller ones as it moves away from the trunk. Remember that a pine that grew in a forest is very different from a field pine - the latter has a dense crown starting one and a half to two meters from the ground, and in a forest pine, most of the trunk is devoid of branches.
Step 4
Place branches not only on the sides of the trunk, but also at the back and front. The branches located directly in front of the trunk will seem to be the shortest and at the same time the thickest, and the branches in the back may not be drawn in detail, confining themselves to shading with a pencil. Also notice that the pine branches get shorter and thinner as they get closer to the top of the tree.
Step 5
Draw the pine needles. With firm strokes of a pencil, go over the ends of the branches, make the tree "fluffy". Branches that are far from the viewer do not need to be drawn in too much detail - the needles can simply be marked with shading. On an old tree, the lower branches may well be dry and bare or broken.
Step 6
Add shadows. Try to place them correctly in one direction, focusing on an imaginary light source. By using deeper shading on the sides of the trunk, you can show its cylindrical shape. Shadows from the branches add expressiveness to the picture.


