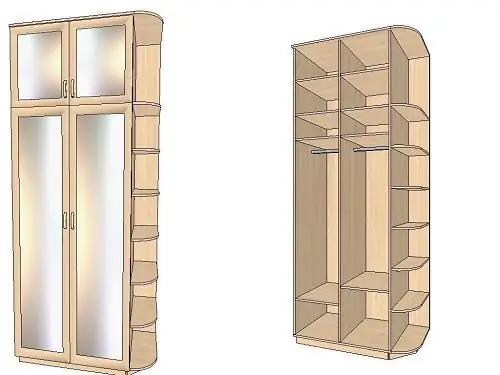
Basically, any cabinet is a parallelepiped or a large box. First, you need to learn how to draw a volumetric parallelepiped in all angles, and then concretize the details by drawing the cabinet itself.

It is necessary
- Paper
- Pencil or pen
- A computer
- Specialized graphics programs
Instructions
Step 1
Drawing on paper. Get started: Select the desired cabinet angle. Consider the perspective. First draw a base, a box. Make sure the proportions are correct. Now, with thin strokes, you need to outline the shadow falling from the cabinet, if you want it to "stand" in the drawing. The shadow can be skipped if you draw a sketch or diagram for future furniture. In any case, a cabinet sketch intended for assemblers is not too different from a simple drawing. More precisely, the sketch is done more carefully and in detail, and it specifically indicates the sizes, colors and materials from which the future product will be made. The drawing will require elaboration of details not in the sense of the accuracy of instructions for future assemblers, but in order for the style to be recognizable and the arrangement of the cabinet in terms of artistic expression and decorativeness.
Step 2
Drawing on paper. Clarification of details. In the drawing of the future cabinet, mark the places for doors, mirrors, decorative elements. If there are glazing beads, decorations and onlays, you need to outline them with thin lines, and also carefully monitor that the lines of the drawing are straight and the perspective is not disturbed when drawing large details. If necessary, you will have to outline some of the details with a ruler. Place shadows under the large, protruding details and in all the existing protrusions. Carefully draw the previously outlined shelves, glazing beads, linings, mirror frames and the contours of the patterns, do the elaboration in color.
Step 3
Computer graphics. Getting started To draw a realistic cabinet on a computer, for example in Photoshop, first apply a texture material to a drawn in perspective box, then gradually modeling shadows and gradients, carefully sketch out the details.
Step 4
Computer graphics. Detail and volume - Expand the details of the cabinet by adjusting the gradient settings in selected areas. Gradients are superimposed on one another, creating overflows of light and shadow, and if they are correctly selected, you do not have to draw separate objects using lines. The same gradients indicate protrusions or indentations, and translucent shadows in several layers make the image three-dimensional, convex.
Don't forget about the distortion effects that create the necessary glare on flat surfaces to add volume to the object, organizing the two-dimensional space of the screen into a high-quality three-dimensional image.


