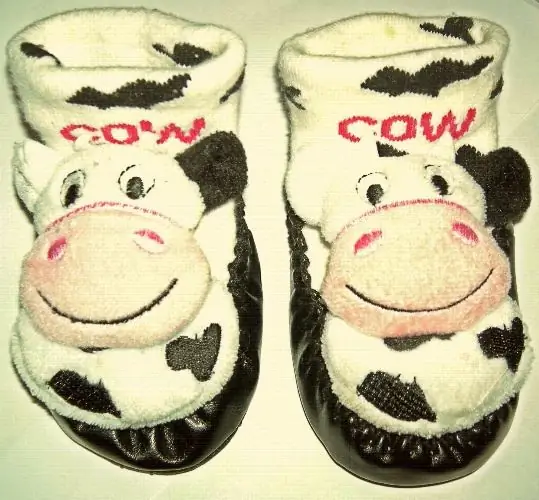
For your little one to wear slippers with pleasure, you can sew them yourself, creating an original, funny and memorable thing. Made with love and care, such a creation will become your baby's favorite thing, and his legs will always be warm and cozy.

It is necessary
Terry socks of the right size, 2 small soft toys, work gloves with rubberized elements on the palm surfaces, satin ribbon 1, 5 - 2 cm wide, adhesive sewing interlining, threads, a needle, scissors
Instructions
Step 1
The work should start by making the soles of the slippers. To do this, take a pair of knitted work gloves with rubberized details on the surface of the palms in the form of dots, stripes or other patterns. It is these palmar surfaces of the gloves that will serve as the sole of the slippers. Cut out these surfaces of the gloves and strengthen them from the seamy side with an adhesive sewing interlining. This will eliminate the deformation of the fabric and allow you to keep in shape. If the length of your child's foot is greater than the size of the piece of fabric from gloves, then the sole will consist of two pieces of gloves connected to each other. On the fabric prepared in this way, draw the sole of the slippers, which is an irregular oval with the largest diameter equal to the length of the child's foot + 1.5-2 cm for outgrowth and seam allowances, and the smallest diameter is approximately half the larger diameter.
Step 2
Sew the satin ribbon to the edge of the cut out soles so that you get a figure with a side. To secure the seams, you can make another additional decorative stitch over the satin ribbon.
Step 3
Put a terry sock in the soles of the slippers prepared in this way. For fitting, you can ask the baby to put on a sock and put the leg in the sole. So you will determine the natural position of the toe in the sole, make a marking (line) along which the sole will be sewn to the toe.
The sole can be sewn with blind stitches or decorative stitches, for example, over the edge. For decoration, you can use threads contrasting in color.
Step 4
The final step is sewing on a soft toy. Sew the toy in such a way that the stitches are not visible. Before you sew on the toy, you should try on the baby's leg. Experimentally determine the location of the toy so that it does not interfere with the child when walking. This can be both in the area of / u200b / u200bthe instep of the foot, and on the outer sides of the lower leg (ankle).


