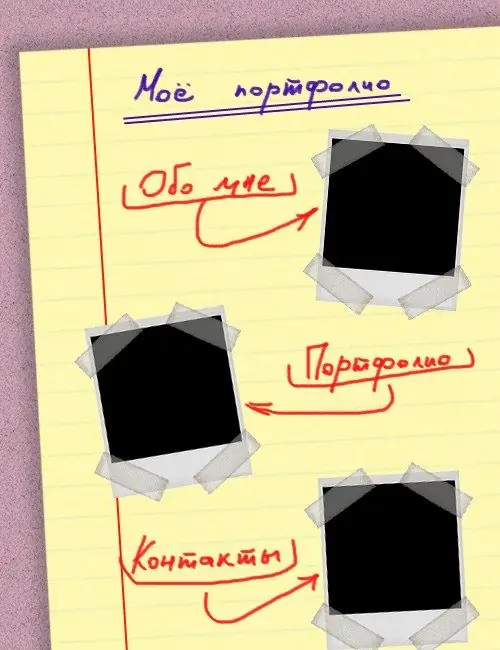
A graphic designer, illustrator, photographer and anyone else whose work is related to the creation of images sooner or later asks the question of creating a portfolio. As an online variation of a business card, it sets the tone for communication with a customer.

It is necessary
Adobe photoshop
Instructions
Step 1
Launch Adobe Photoshop and create a new document (Ctrl + N or File> New) 500 pixels wide and 650 pixels high. Create a background: Layer> New Fill Layer> Pattern, in the window that appears, immediately click OK, and in the next one select the background that suits your opinion (in the picture there is a pattern called Pink with Flecks, it is in the Color Paper section) and click OK again
Step 2
Create another document of the same size and fill it in the same way with the Yellow Lined pattern, also found in the Color Paper section. Save the document (Ctrl + S) with the Jpeg extension. Open the saved document, drag it onto the document created in the first step of the instruction, and use the free transform command to place it as shown in the picture
Step 3
Create a shadow from the document in the form of a notebook sheet. To do this, in the list of layers, right-click on this layer and select Blending Options. Select the Drop Shadow tab and adjust the shadow as you like. Pay attention to the Angle item, with the help of it you need to set the angle of fall of the shadow. Click OK
Step 4
Select the Line Tool (hotkey U, switch between adjacent elements Shift + U), set the color to red and create a strip on the sheet that imitates notebook fields
Step 5
Create a new layer. Select a blue color and then the Brush Tool (B, Shift + B) and write freehand at the top of the My Portfolio sheet. Use the Line Tool to underline the My Portfolio label. On the other hand, for this purpose, you can use a font (T, Shift + T), for example, Acquest Script or Alexandra Zeferino One. They are not present in Windows, but they can be found on the page linked at the bottom of this manual
Step 6
Download an image with a photo template on the Internet, open it in Adobe Photoshop, cut it out (for this you can use the Magic Wand Tool, Magnetic Lasso Tool, etc.) and place it on the main document. Using the Free Transform command, adjust to the desired size and rotate to the desired angle. Place in the desired location
Step 7
Copy the photo template twice using the Ctrl + J hotkeys. Just as in the previous step of the instruction, place them at the right angle and in the right places
Step 8
Use the Brush Tool or the Type Tool to create captions for these pictures.


