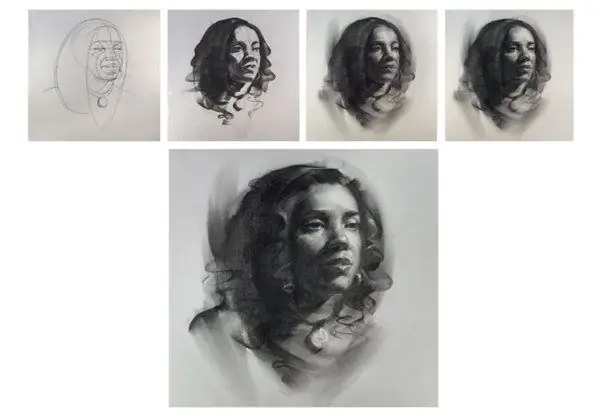
Charcoal painting is considered a classic technique that is ideal for portraits. This image technique has absorbed the merits of many others, for example, the richness of colors, the ability to improvise, etc.

Preparation for work
First you need to do the simulation, i.e. preparatory work to identify large dark and light areas of the pattern.
Try to arrange them so that you get an interesting composition. To begin with, think over large planes and outlines so that the portrait turns out to be harmonious and pleasant. Details can be added at any time. Find the right size-to-shape ratio by marking out light and dark areas. Try to fill as much of the free space with the pattern, use interesting accessories such as a scarf, shawl, veil, or a large collar.
For work you will need:
- photography or live model;
- sheet of A3 format;
- charcoal pencil;
- regular pencil;
- washing gum;
- a small sheet of cardboard;
- shader;
- stationery knife.
Drawing a portrait
With a simple pencil, outline the outline of the head, then outline the structure of the face for yourself. Now you can move on to drawing with charcoal. Mark all the dark spots, moving from dark areas to light ones. Try to paint in two or three tones. Do not paint over dark areas too much, all this can be done later, at the final stage of work.
First of all, you need to show the tone of the face in the portrait. Charcoal drawing does not imply such shading as with the pencil technique, so for this it is better to use a piece of coal, crushed to a state of flour. This powder is used to create a complexion with a finger. Proceed with caution, because it is very difficult to do it in this way evenly. Do not forget to leave places for glare, they are located on the convex parts of the face - this is the nose, forehead, cheeks.
Next, start to refine the proportions. This is a long work, because you need to convey the volume of forms and space with the help of color. The outline is only needed to understand the shape. A darker, brighter color can be used at this stage. Do not go to small details, do not draw a face, transfer large details first - the shape of the clothes, the hair.
As soon as the general idea is clear, you can move on to the face. Model its shape, details. Work through the dark areas little by little and highlight the light areas. Now we need to show shadows and penumbra on the face. All this is done with your finger, observing the uniformity and smoothness of the transitions from shadow to light areas.
It's time for little things. Draw jewelry, small details, eyebrows, eyelashes, teeth. Draw the eyes and be sure to include highlights, although they can be done after using acrylic paint. This will make your drawing look more picturesque. For more realism, be sure to show shadows on the face.


