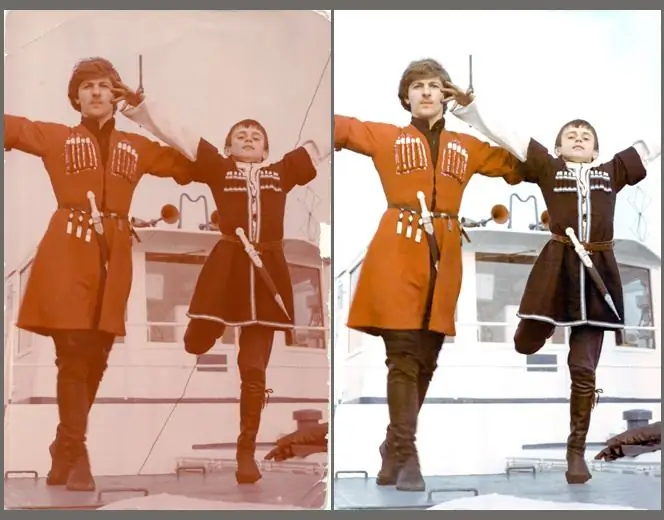
Digital cameras have entered our lives not so long ago, and many people have valuable and memorable old photographs in their family archives. Unlike modern digital photographs, these photographs exist in a single copy and will consistently wear out over the years, fading and becoming covered with cracks, tears and spots. Using modern image editors, you can learn how to restore old photographs, returning them in digital format to their original fresh look.

Instructions
Step 1
First, scan your photo in high resolution. See what exactly in the photo needs to be retouched and restored.
Step 2
Begin correcting a photo with the largest and most noticeable defects - cracks, traces of tears and gluing, spots, and so on. To do this, on the Photoshop toolbar, select the Healing brush tool and use this tool to correct serious photo flaws.
Step 3
Moving on to finer and finer details, use the Spot healing brush tool. The Clone Stamp tool will also help you. These tools will allow you to accurately eliminate small and pinpoint defects, and using the stamp tool, you can discreetly and efficiently remove large defects even on the face of the depicted person.
Step 4
With the alt="Image" key pressed, click on the place from which you will take a copy of the background for the stamp, and paint over the flaw with it. First, try to tidy up the person's background and clothing, and only lastly move on to editing the face.
Step 5
It often happens that for some reason some parts of the photograph are lost - for example, the depicted person is missing one eye or part of the face. Photoshop will help you here too.
Step 6
If the person in the photo is missing one eye, select the area with the second eye and copy to a new layer (Layer via copy). Transform the eye using Edit> Free Transform and flip the eye horizontally (Flip horizontal).
Step 7
Place the copy in the desired place of the face and reduce the opacity of the eye copy layer. In reduced opacity mode, correlate the position of the eye to the previous one, and then return the opacity to 100%.
Step 8
In layer mask mode, paint over with a soft black brush the areas you want to eliminate in the photo. Recreate small details using Clone Stamp and warp tool.
Step 9
After fixing all the defects, open the filters menu and reduce the noise level (Reduce Noise), and then restore the clarity of the image. In the Curves section, set the appropriate curve positions to make the photo brighter and more vivid.


