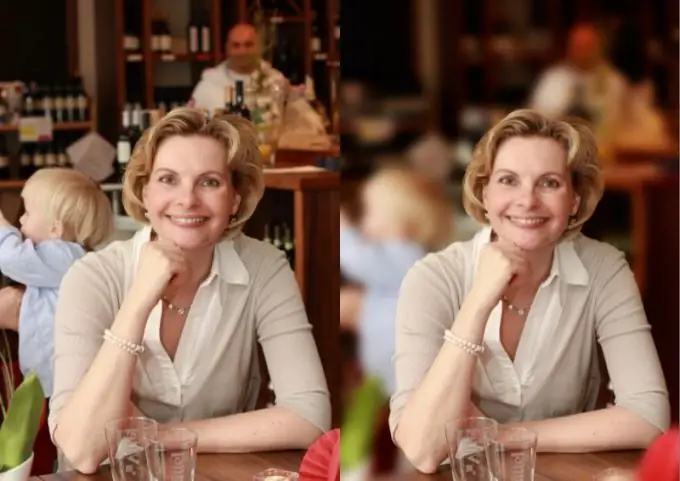
The background on which the photo was taken is not always successful. For example, a photo can be spoiled by an indecent inscription, which was noticed only after they began to view the pictures in the photo. Is there any way to fix the situation or will the photo have to be deleted? Take your time: take advantage of the special effects provided by Photoshop, for example, the ability to blur the outline and background.

It is necessary
- - Personal Computer;
- - the program "Photoshop".
Instructions
Step 1
Open the photo you are going to edit in Photohop. This photo will be placed on the first layer.
Step 2
Copy the photo to a new layer. To do this, go to the menu, selecting the "Layers" tab, and select "New", and then go to the item "Copy to a new layer". All these manipulations can be replaced by pressing the key combination "Ctrl + J". Make all changes exclusively on a new - second layer.
Step 3
Access the menu and go to "Filter" by choosing "Blur". Narrow down your choices with Gaussian Blur. The intensity of the blur is controlled by only one parameter (you should specify it to choose from: that is, choose the value of the indicator at which, in your opinion, the blur will be ideal).
Step 4
Add a mask to the blurred layer and start "developing" the photo. To do this, go to the "Layer" menu and select "Layer Mask", specifying "Show All" in the options. Although after the last actions nothing will change in the photo, a white quadrilateral should appear on the right next to the new layer.
Step 5
Go to the toolbox and use the brush tool. But before using the "brush", adjust the parameters of this tool. Set the optimal value (range 20-40 percent) for the "brush". Remember that the higher the value of the set parameter, the coarser the transition between the sharp elements of the photo and the blur will be.
Step 6
Open the second layer and paint over the shape of the person shown in the photo with a brush. Then connect the layers and admire the resulting photo.


